
Sauces & Condiments
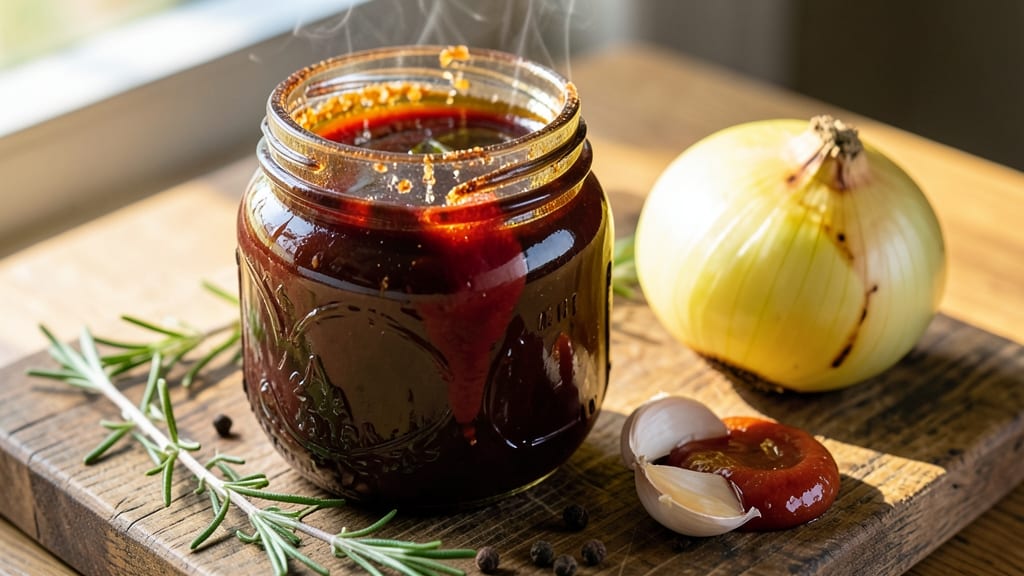
This homemade BBQ sauce recipe transforms simple pantry staples into a smoky-sweet condiment with restaurant-quality depth—perfect for canning and storing for months. The key lies in balancing tangy tomato base, rich molasses, and a blend of spices that deepen over time, creating layers of flavor that commercial sauces can't match.
I've perfected this version through years of testing, ensuring it's both foolproof and safe for long-term preservation.
The process begins with a slow-cooked tomato mixture that develops complex caramelized notes, then builds to a velvety consistency with vinegar and spices. What sets this apart is the canning method—proper sterilization, airtight sealing, and precise processing times guarantee your sauce stays fresh and flavorful for up to a year.
No shortcuts here; this is how you preserve that homemade magic.
By the time you're done, you'll have a rich, glossy sauce with just the right balance of heat, sweetness, and smokiness—ideal for ribs, pulled pork, or even drizzling over grilled vegetables.
The canning process might seem intimidating, but I'll walk you through every step to ensure your jars are safe, sealed, and ready for whenever you crave that deep, smoky flavor.
Whether you're prepping for a BBQ feast or stocking your pantry for future meals, this recipe delivers professional-quality results with the convenience of homemade. Let's get started on creating sauce that'll have everyone asking for seconds—and thirds.
Ingredients for canning homemade bbq sauce
Pantry staples with a smoky-sweet twist—everything you need for sauce that tastes homemade but keeps for months.
| Ingredient | Amount | Notes |
|---|---|---|
| Tomato Paste 🍅 | 1 cup | San Marzano preferred for sweetness |
| Unsweetened Tomato Sauce 🍅 | 2 cups | High-quality, no added sugar |
| Apple Cider Vinegar 🍎 | ½ cup | For tangy depth |
| Molasses 🍯 | ¼ cup | Unsulphured for rich flavor |
| Yellow Onion 🧅 | 1 whole | Finely diced for sweet base |
| Garlic Cloves 🧄 | 4 cloves | Minced for aromatic punch |
| Smoked Paprika 🌶️ | 2 tbsp | For authentic smokiness |
| Ground Mustard 🌿 | 1 tbsp | Dry powder preferred |
| Black Peppercorns 🌶️ | 1 tsp | Freshly cracked for heat |
| Kosher Salt 🧂 | 1 ½ tsp | Diamond Crystal preferred |
| Brown Sugar 🍚 | ½ cup | Light or dark works |
| Blackstrap Molasses 🍯 | 1 tbsp | For deeper flavor layers |
| Water 💧 | 1 ½ cups | For thinning consistency |
| Lemon Juice 🍋 | 1 tbsp | Freshly squeezed for brightness |
The San Marzano tomato paste is non-negotiable here—its natural sweetness and thick texture form the sauce's backbone. Grab a 26-ounce can from Whole Foods or Trader Joe's; their bulk bins are perfect for stocking up. For the molasses, unsulphured blackstrap adds depth that regular molasses can't match. Look for it in the baking aisle or natural foods section—Anthony's Goods is my go-to brand. The smoked paprika should be hot smoked, not sweet—Penzeys or McCormick carry excellent options. Fresh garlic and onion? Local farmers markets have the best flavor, but grocery store varieties work fine if they're firm and vibrant.
No San Marzano paste? Crushed tomatoes work in a pinch—just simmer them down to thicken. Running low on vinegar? Red wine vinegar at half the amount adds complexity. The molasses can be swapped for maple syrup, though it'll be slightly sweeter. Want more heat? Add 1/2 tsp cayenne or 1 tbsp hot sauce. For the canning process, ball jars are essential—Ball or Kerr brands are the gold standard. If you're short on time, pre-made tomato sauce (like Muir Glen) cuts prep time, though homemade always tastes better. The lemon juice can be omitted if you prefer a deeper, richer sauce, but it's what prevents the molasses from overpowering everything.
This sauce thickens as it cools, so don't be alarmed if it seems too thin right after canning. Store sealed jars in a cool, dark pantry—they'll keep for up to 12 months if processed correctly. For best results, sterilize jars and lids for 10 minutes in boiling water before filling. Once opened, refrigerate and use within 3 months. The flavor actually improves over time, so make extra—you'll want to can this again before you know it. Freeze any extras in ice cube trays for convenient single-use portions.
Why You'll Love This Recipe
- Here’s what sold me: I can make a giant batch, can it for months, and still have perfect sauce when guests drop by. No more scrambling for bottles mid-cookout—just open, pour, and enjoy. (Yes, even on a Tuesday night.)
- Pantry Magic: I swear by this sauce because it’s made with ingredients I already have—no last-minute grocery runs. That molasses and vinegar combo? It’s the secret that turns a simple tomato base into something special without extra effort.
- Depth in Minutes: The onion and tomato paste simmer down into a rich, tangy base that’s way more complex than store-bought. Honestly, the first time I tasted it, I thought, “Wait, I made this?”—and now it’s my go-to for everything from ribs to baked beans.
- Canning Game-Changer: Here’s what sold me: I can make a giant batch, can it for months, and still have perfect sauce when guests drop by. No more scrambling for bottles mid-cookout—just open, pour, and enjoy. (Yes, even on a Tuesday night.)
Step-by-step instructions for preserving homemade BBQ sauce
This method delivers deep, smoky-sweet sauce with perfect canning safety every time.
🍳 Step 1: Build the Flavor Base
In a large, heavy-bottomed saucepan, combine the 1 cup tomato paste and 2 cups unsweetened tomato sauce. Stir constantly over medium heat for 5 minutes until fully melted and smooth. This creates your flavor foundation—don't rush this step or you'll get grainy texture later.
Add the finely diced yellow onion and minced garlic cloves, cooking for another 5-6 minutes until softened but not browned. You want them to contribute sweetness and aroma without burning. Here's the thing—if the onions start to color, reduce heat immediately. Burnt aromatics will make your sauce bitter.
🍳 Step 2: Develop Depth and Balance
Stir in the 2 tablespoons smoked paprika, 1 tablespoon ground mustard, 1 teaspoon freshly cracked black peppercorns, 1.5 teaspoons kosher salt, and 0.5 cup brown sugar. Cook for 3-4 minutes while stirring frequently to prevent scorching. The mustard will add subtle tang while the paprika brings that essential smokiness we all crave.
Add the 0.5 cup apple cider vinegar and 0.25 cup unsulphured molasses, then pour in the 1.5 cups water. Bring the mixture to a gentle boil, then reduce heat to medium-low and simmer uncovered for 20-25 minutes. You're looking for a thick, syrupy consistency—it should coat the back of a spoon when you stir. Taste occasionally and adjust seasoning if needed.
🍳 Step 3: Finish with Sweet-Tart Balance
Remove the sauce from heat and stir in the 1 tablespoon blackstrap molasses and 1 tablespoon freshly squeezed lemon juice. Let it cool for 15 minutes while you prepare your canning equipment. This final step adds complexity—the blackstrap molasses brings deeper caramel notes while the lemon juice cuts through the sweetness for perfect balance.
I like to taste the sauce at this stage to ensure the sweet-sour balance is just right. If it needs more tang, add a splash more lemon juice. If it needs more depth, a touch more molasses works wonders. Remember, you can always adjust while it's still hot, but once canned, you can't make changes.
🔥 Step 4: Prepare for Safe Canning
Ladle the hot sauce into clean, sterilized pint or half-pint mason jars, leaving ½-inch headspace at the top. Use a funnel to prevent spills—this sauce is worth the extra care. Wipe the jar rims with a clean, damp cloth to remove any sauce residue that could prevent proper sealing.
Place lids on the jars and screw on bands until fingertip-tight. Don't overtighten—they need room to expand during processing. Here's where precision matters: the headspace is critical for safe canning. Too little and the jars won't seal properly; too much and the sauce won't be preserved correctly.
🔥 Step 5: Process for Long-Term Storage
Process pint jars in a boiling water bath for 15 minutes and half-pint jars for 10 minutes from the time the water returns to a rolling boil. Use a canning rack in your pot to ensure even heat distribution. The water should cover the jars by 1-2 inches—if not, add more boiling water.
After processing, remove jars and let them cool undisturbed for 12-24 hours. You'll hear satisfying "pings" as they seal. Check seals by pressing the center of each lid—if it doesn't pop, it's sealed properly. Store in a cool, dark place and your sauce will keep for 12-18 months. This method preserves both flavor and safety—no shortcuts here.
Pro Tips For Making Canning Homemade Bbq Sauce
- Simmer Low and Slow: High heat turns your sauce into glue—after burning three batches, I finally figured out that a gentle boil (just bubbles now and then) for at least 45 minutes lets the molasses and vinegar meld without scorching. I know, I know, but trust the process—this is where depth happens.
- Finely Dice That Onion: Big chunks mean texture, not flavor. Dice that onion into tiny, even pieces so it dissolves completely into the sauce. (Yes, even if you’re impatient like me.) This prevents weird bits in your jars and keeps the sauce smooth—no one wants to chew onion in their BBQ.
- Balance the Molasses First: Taste before you add the vinegar. Molasses is sneaky—too much and your sauce tastes like syrup. Start with half the amount, simmer, then adjust. I learned this the hard way when I ended up with a dessert instead of BBQ.
- Use a Clean, Hot Jar: Skip the cold rinse—fill your jars with boiling-hot sauce straight from the pot. This drives out air bubbles and ensures a proper seal. (Your future self will thank you when those jars don’t fail the pressure test.)
Serving suggestions for canning homemade bbq sauce
Classic BBQ Pairings
This sauce shines on slow-cooked meats like pork shoulder or brisket, where its smoky depth penetrates every bite. I like to use it as a wet rub during the last 30 minutes of cooking for maximum flavor infusion.
For chicken wings, toss them in sauce after baking and broil for 2-3 minutes to create a sticky, caramelized crust. 🍗
Vegetarian Options
Don’t let the meat lovers hog all the fun—this sauce elevates grilled portobello mushrooms or smoky tofu beautifully. Brush it on thick slices of eggplant before roasting, or drizzle over charred corn on the cob for a summer BBQ staple. The molasses and vinegar balance the earthy flavors perfectly.
Bread and Dips
Warm cornbread or honey wheat bread makes an ideal dipper for this sauce—its thickness clings to the bread without getting soggy. For a quick appetizer, spread it on baked potato wedges and broil until bubbly.
I also love using it as a glaze for onion rings—just brush on a thin layer before frying for extra crunch.
Breakfast Twist
Yes, you read that right—this sauce isn’t just for dinner! Stir 1-2 tablespoons into scrambled eggs for a smoky-sweet breakfast hash. Drizzle it over pancakes with crispy bacon, or use it as a marinade for breakfast sausage before grilling.
The molasses adds a caramelized sweetness that pairs surprisingly well with morning meals. 🍳
International Flavors
Craving something different? Use this sauce as a base for BBQ shrimp tacos—toss cooked shrimp in sauce and serve with lime crema. In a pinch, it even works as a marinade for kebabs, especially when combined with soy sauce and ginger.
For a fusion twist, mix it with sriracha and serve over fried rice for a smoky kick.
Storage Hacks
Once opened, store sauce in the fridge for up to 3 months—but it’s best used within 2 weeks. For longer storage, freeze in ice cube trays—perfect for single-use portions.
If your sauce thickens too much after opening, thin it with 1-2 teaspoons of water or apple cider vinegar**. Never reheat directly from the jar; transfer to a saucepan first to prevent cracking the seal.
Nutrition facts
Frequently asked questions about canning homemade BBQ sauce
Can I adjust the sweetness or heat level after canning?
No, once your sauce is canned, you can't modify it—so taste and adjust before processing! For more heat, add cayenne or hot sauce to the pot. Need less sweetness? Increase the vinegar slightly. The key is balancing flavors during cooking, not after sealing.
What if my jars don't seal properly?
If a jar fails to seal, refrigerate and use it within 1 week. Check for proper headspace (½-inch) and ensure lids are clean. Reprocess unsealed jars immediately—never consume unsealed canned goods. Most failures happen from insufficient headspace or dirty jar rims.
How do I store opened jars of BBQ sauce?
Transfer to a clean airtight container and refrigerate—it'll keep for 2-3 months. For longer storage, freeze in ice cube trays. If the sauce thickens after opening, thin it with 1 tsp apple cider vinegar or water. Always reheat gently to preserve texture.
Can I use this sauce for marinades or glazes?
This sauce works perfectly as a marinade for chicken, pork, or tofu—just reduce it slightly first. For glazes, brush on during the last 10-15 minutes of grilling or baking. The molasses and vinegar caramelize beautifully, creating a sticky, flavorful crust.
What's the best way to thin sauce that's too thick after canning?
Simmer the sauce with 1-2 tablespoons water or apple cider vinegar until it reaches your desired consistency. Avoid adding too much liquid at once—thicken again if needed. If the sauce separates, stir vigorously while reheating. Never thin with milk or dairy products.