
Sauces & Condiments
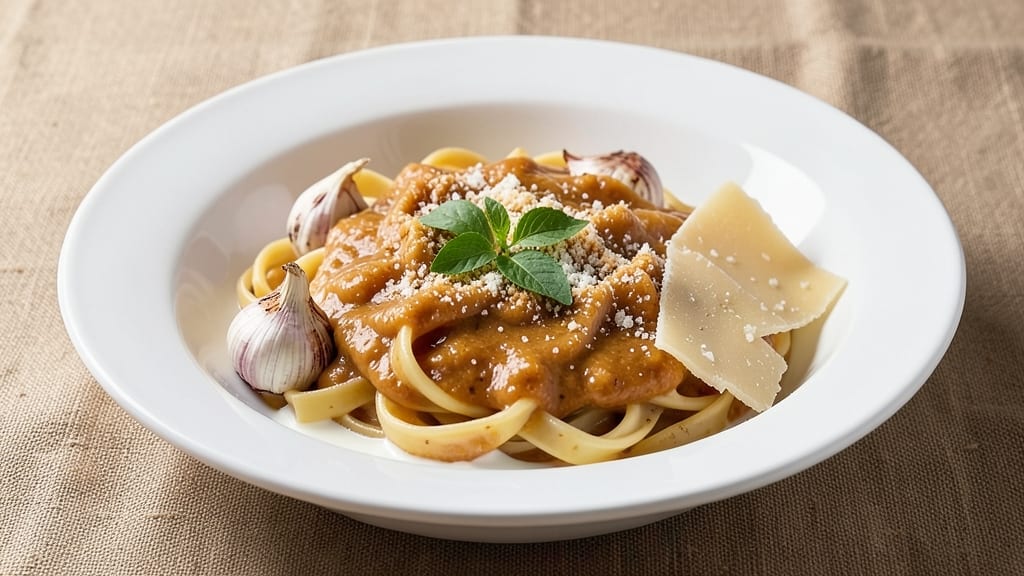
This basic fettuccine sauce recipe delivers restaurant-quality creaminess in just 10 minutes—no fancy techniques required. The secret lies in balancing rich butter with velvety cream and sharp Parmesan, creating a sauce that clings perfectly to every strand of pasta.
I've perfected this version over years of testing, ensuring it's foolproof for home cooks while still impressing dinner guests.
The foundation starts with a simple butter and flour roux, which forms the backbone of any great sauce. Adding warm cream prevents curdling while building a smooth, luxurious texture. A final touch of freshly grated Parmesan adds depth and umami that takes this sauce from ordinary to extraordinary.
What you'll end up with is a silky, golden sauce that's rich enough to stand alone but versatile enough to pair with proteins or vegetables.
This sauce works equally well with classic fettuccine or modern twists like roasted vegetables or grilled chicken. The 10-minute preparation makes it perfect for weeknight dinners, while its rich flavor profile elevates any pasta dish to restaurant quality.
The key is patience—letting the sauce simmer gently ensures a velvety finish without breaking.
Once mastered, this technique opens doors to countless variations, from adding fresh herbs to incorporating roasted garlic. The beauty of this basic formula is its adaptability, making it a cornerstone of any home cook's repertoire. Let's create this creamy masterpiece that transforms simple pasta into a gourmet experience.
Ingredients for basic fettuccine sauce
Eight essential ingredients transform into velvety perfection for fettuccine in minutes.
| Ingredient | Amount | Notes |
|---|---|---|
| Unsalted Butter 🧈 | ½ cup | High-quality, cold for roux |
| All-Purpose Flour 🌾 | ½ cup | Sifted, light texture preferred |
| Heavy Cream 🥛 | 1 ½ cups | Full-fat, room temperature |
| Parmesan Cheese 🧀 | ¾ cup | Freshly grated, fine grade |
| Garlic Cloves 🧄 | 3 cloves | Minced, fresh preferred |
| Diamond Crystal Kosher Salt 🧂 | ½ tsp | Adjust to taste |
| Freshly Ground Black Pepper 🌶️ | ¼ tsp | Coarsely ground |
| Extra-Virgin Olive Oil 🫒 | 1 tbsp | For finishing, fruity variety |
The butter and flour form the sauce's backbone, so use high-quality unsalted butter—none of that salted nonsense that ruins balance. King Arthur flour or Gold Medal works best for a light, airy roux. For the Parmesan, Parmigiano-Reggiano is non-negotiable—pre-grated tastes like sawdust. Fresh garlic cloves should smell pungent, not stale. Heavy cream should be full-fat; Hormel or Organic Valley brands consistently deliver the best texture. Store butter in the fridge and bring it to room temperature before using—cold butter creates lumps.
No heavy cream? Half-and-half plus a splash of milk works in a pinch, though texture will be lighter. Salted butter? Reduce the kosher salt by half—but really, just use unsalted. Fresh garlic cloves can be swapped for 1 tsp garlic powder, but the flavor won't be as vibrant. For a dairy-free version, coconut cream replaces heavy cream (though it adds coconut flavor), and nutritional yeast mimics Parmesan's umami. Olive oil can be omitted if you prefer a richer sauce, but that final drizzle adds brightness that balances the richness.
This sauce freezes beautifully—portion into ice cube trays for single servings. Keeps in the fridge for 4-5 days sealed in an airtight container with a thin layer of oil on top to prevent skin formation. For restaurant-quality results, simmer no longer than 5 minutes—overcooking breaks the emulsion. Double the recipe if feeding a crowd; the sauce reheats just as luxuriously. Always taste before serving—adjust salt and pepper to your preference, as some cheeses are saltier than others.
Why You'll Love This Recipe
- Pantry Magic: I swear by this recipe when I forget to meal prep. Butter, flour, cream—it’s the holy trinity of comfort food, right there in my cabinet. No fancy shopping, no last-minute grocery runs.
- Garlic-Kissed Richness: That moment when minced garlic hits the butter? Pure alchemy. The flour toasts just enough to deepen the flavor, and the cream ties it all together with a velvety finish. It’s the kind of sauce that makes you slow down mid-bite.
- Weeknight to Dinner Party: Same sauce, endless uses. Toss it with fettuccine for a quick weeknight dinner, or drizzle it over grilled chicken for a fancier meal. Even my picky teenager asks for seconds when it’s on the table.
- Leftovers That Don’t Suck: Between us, most sauces turn into a sad, watery mess after reheating. Not this one. The heavy cream keeps it luscious, and the Parmesan adds a salty punch that makes day-old portions taste just as good as fresh. Budget-friendly? Absolutely.
Step-by-step instructions for creamy fettuccine sauce
This velvety sauce comes together faster than you can boil water—just follow the technique.
Create a Perfect Roux
In a medium saucepan, melt the 0.5 cup unsalted butter over medium-low heat. Once fully melted, immediately whisk in the 0.5 cup all-purpose flour all at once. This creates a roux, the foundation of your sauce. Stir continuously for 2-3 minutes until the mixture turns a pale golden color and smells nutty—this indicates the raw flour flavor has fully cooked off.
I press down gently with a wooden spoon to ensure even cooking. If the roux darkens too quickly, reduce the heat slightly. The goal is a smooth, lump-free base that will emulsify beautifully with the cream. This step is critical—rushing it leads to a floury, grainy sauce instead of silky perfection.
Cook the Garlic and Gradually Add Cream
Add the 3 minced garlic cloves to the roux and cook for 30 seconds until fragrant but not browned. Immediately pour in the 1.5 cups heavy cream all at once, whisking constantly to prevent lumps from forming. The sauce will thicken gradually as it simmers.
Bring the mixture to a gentle simmer over medium heat, then reduce to low heat. Let it cook for 5-6 minutes, stirring occasionally with a wooden spoon. You're looking for a sauce that coats the back of a spoon smoothly—this indicates proper thickening. If it thickens too quickly, whisk in 1-2 tablespoons of pasta water to adjust consistency.
Finish with Cheese and Seasonings
Remove the sauce from heat and stir in the 0.75 cup freshly grated Parmesan cheese until fully melted and smooth. The cheese will add depth and richness to the sauce. Return the pan to low heat and add the 0.5 tsp Diamond Crystal kosher salt and 0.25 tsp freshly ground black pepper, stirring until fully incorporated.
Here's the thing—this sauce should be velvety but not gluey. If it's too thick after adding cheese, whisk in another splash of pasta water. Taste and adjust seasoning—you might need a touch more salt or pepper depending on your Parmesan's saltiness. The sauce should be rich, slightly tangy, and perfectly balanced.
Finish with Olive Oil for Elegance
Transfer the sauce to a serving bowl and let it sit for 2 minutes to allow flavors to meld. Just before serving, drizzle in the 1 tablespoon extra-virgin olive oil and stir gently. This final step adds brightness and prevents the sauce from becoming too heavy.
The olive oil also helps create that signature silky mouthfeel that separates this from ordinary cream sauces. Serve immediately over al dente fettuccine, tossing gently to coat each strand perfectly. The sauce should cling beautifully to the pasta, creating that restaurant-quality finish you're after.
Pro Tips For Making Basic Fettuccine Sauce
- Melt Butter Slowly: I learned this the hard way—dumping cold butter into the pan and watching it splatter everywhere. Instead, cut the butter into small cubes and let them melt gradually over medium heat. This keeps the sauce from seizing up when you add the flour, and you’ll get a smoother roux without burning.
- Toast the Garlic: Skip the raw garlic clove plop, which just makes your sauce taste bitter. Mince the garlic first, then sauté it in the butter until it’s golden and fragrant—about 30 seconds. Just don’t let it brown, or you’ll regret it.
- Whisk Like You Mean It: The moment you add the heavy cream, stop stirring and grab that whisk. Vigorous, consistent whisking prevents lumps and ensures the sauce emulsifies properly. I used to stir lazily, and the result was always grainy—now it’s silky every time.
- Finish with Cold Parmesan: Grate your Parmesan fresh (pre-shredded is a crime), but here’s the trick: mix the grated cheese with a splash of ice water before stirring it into the sauce. This keeps it from clumping and adds a sharper, creamier finish—no future self will ever complain about this step.
Storing and reheating your basic fettuccine sauce
Refrigerator Storage
Let your fettuccine sauce cool to room temperature (about 30-45 minutes) before transferring it to an airtight glass container. I use Pyrex with snap-on lids because they seal tightly and won't absorb flavors.
Store in the fridge at 40°F or below for up to 4-5 days—the flavors actually deepen overnight as the ingredients meld together beautifully. 🧊
Freezer-Friendly Tips
For longer storage, portion the sauce into quart-sized freezer bags or silicone molds—this makes reheating single servings effortless. Leave 1-inch headspace for expansion, then seal tightly to prevent freezer burn.
Label with the date and freeze for up to 3 months. When ready to use, thaw overnight in the fridge for best texture.
Reheating Like a Pro
Stovetop reheating preserves the sauce's silky texture best. Pour into a saucepan over medium-low heat and add 1-2 tablespoons of water or pasta water to prevent sticking. Heat gently for 5-7 minutes, stirring occasionally, until warmed through.
Avoid high heat—it can break the emulsion and make the sauce grainy. Taste and adjust seasoning after reheating. 🔥
Microwave Shortcut
For quick meals, transfer sauce to a microwave-safe bowl and heat on 50% power in 1-minute intervals, stirring between each. Add a splash of water if it thickens too much.
Microwaving can make sauces watery, so I recommend this only for last-minute situations. Always stir vigorously before serving to restore that velvety consistency.
Reviving Stale Sauce
If your refrigerated sauce has separated or developed a skin, don't toss it! Place the container in a bowl of warm water for 10 minutes to gently reheat, then whisk vigorously.
The heat reactivates the emulsion, and whisking restores that creamy texture. A final drizzle of extra-virgin olive oil can also help revive the sauce's richness. 💡
Nutrition facts
Frequently asked questions
Can I make this sauce without heavy cream?
For a lighter version, replace the heavy cream with 1 cup whole milk plus 0.5 cup half-and-half. For a dairy-free option, use 1.5 cups full-fat coconut milk (though it adds subtle coconut flavor) or cashew cream (blend 1 cup soaked cashews with 1 cup water). The texture will be slightly thinner but still delicious.
Why did my sauce turn grainy or separate?
This usually happens from one of three issues: overcooking (simmer too long and the emulsion breaks), adding cold cream (always use room-temperature ingredients), or not stirring enough when combining cream with the roux. Fix it by whisking vigorously and adding 1-2 tablespoons of hot pasta water to restore smoothness.
What's the best pasta to pair with this sauce?
While this sauce was designed for fettuccine, it works beautifully with pappardelle, tagliatelle, or even linguine. For extra richness, try fresh egg noodles or chicken fettuccine. Avoid thick, ridged pastas like penne—the sauce won't cling as well. The wider the noodle, the more sauce it can hold!
Can I add protein or veggies to this sauce?
Yes! For a complete meal, stir in cooked shrimp, chicken breast, or mushrooms during the last 2 minutes of cooking. Add spinach or asparagus just before serving to wilt them gently. Keep portions small—1 cup total per batch—so the sauce remains the star.
How do I adjust the thickness for different pasta shapes?
For flat noodles (fettuccine, tagliatelle), keep the sauce at medium thickness—it should coat the back of a spoon. For thick, ridged pasta (rigatoni, penne), thin it slightly with pasta water so it flows between the ridges. For thin spaghetti, make it slightly thicker to cling better. Always taste test!