
Sauces & Condiments
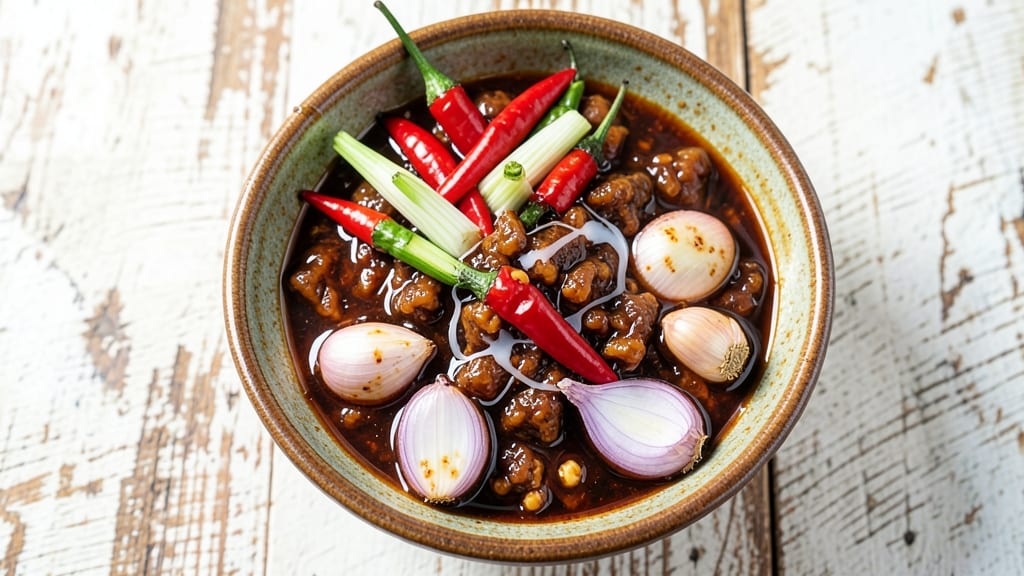
This authentic Thai chili sauce recipe delivers the bold, complex flavors of street-side Thai cuisine with just a few fermented ingredients and fresh chilies. The secret lies in fermented shrimp paste (kapi), which adds umami depth that store-bought sauces can't match, balanced by bright vinegar and fiery Thai chilies. I developed this version after tasting the difference between homemade and bottled—once you try it, you'll never go back.
The sauce starts with a paste of shrimp paste, garlic, shallots, and lemongrass, then simmers with vinegar and chilies until thick and aromatic. This method preserves the sauce's vibrant red color and intense heat while letting the fermented flavors develop.
For a vegan version, substitute shrimp paste with soy sauce and mushrooms, though purists will notice the difference in depth.
What sets this sauce apart is its versatility—drizzle it over noodles, stir into soups, or serve as a dipping sauce for grilled meats. The balance of sweet, sour, salty, and spicy makes it a pantry staple.
Store it in the fridge for up to a month, or preserve it in sterilized jars for longer shelf life. The first time you taste the umami kick from the shrimp paste, you'll understand why this sauce is a game-changer.
For those new to fermented ingredients, start with a smaller batch to test your tolerance for the bold flavors. The shrimp paste can be strong, so adjust to taste, but remember: authenticity depends on it.
This isn't just a chili sauce—it's a flavor experience that transforms any dish into something extraordinary.
Ingredients for authentic thai chili sauce
Nine ingredients, one sauce—authentic Thai heat that transforms any dish instantly.
| Ingredient | Amount | Notes |
|---|---|---|
| Fermented Shrimp Paste (Kapi) 🦐 | 2 tbsp | Authentic Thai brand preferred |
| Garlic Cloves 🧄 | 6 cloves | Peeled, roughly chopped |
| Shallots 🧅 | 4 whole | Peeled, roughly chopped |
| Lemongrass Stalks 🌿 | 2 whole | Bruised, cut into 2-inch pieces |
| Thai Bird's Eye Chilies 🌶️ | 6 whole | Stems removed, seeds kept |
| White Vinegar 💧 | ½ cup | White or apple cider vinegar |
| Palm Sugar 🍯 | ¼ cup | Or brown sugar substitute |
| Fish Sauce 🍶 | 1 tbsp | Red Boat brand recommended |
| Salt 🧂 | ½ tsp | Kosher or sea salt |
The shrimp paste is non-negotiable for that deep umami kick. Thai markets or Asian grocery stores carry the best—look for brands like Supaporn or Thai Kitchen. If you can't find it, fermented shrimp paste from Amazon works in a pinch, though the flavor won't be as refined. The chilies? Bird's Eye is essential for that signature Thai fire, but if you can't handle the heat, swap in serrano peppers. Lemongrass needs to be fresh—no dried substitutes here. Bruise the stalks with the side of your knife to release those citrusy oils. Palm sugar adds just the right sweetness, but light brown sugar works if you're in a hurry.
No shrimp paste? Soy sauce plus mushrooms is the vegan swap, though it'll lack that funky depth. Short on lemongrass? Lime zest plus a splash of lime juice adds brightness. The fish sauce can be omitted if you're avoiding it, but the sauce will taste noticeably different. Palm sugar too hard to find? Any light brown sugar does the trick, just taste as you go. The vinegar is key—white or apple cider both work, but avoid balsamic. For extra heat, keep those chili seeds in. For milder sauce, remove them before blending.
This sauce keeps for 1 month in the fridge, sealed tight. For longer storage, sterilize jars and process in a water bath for 10 minutes. The flavor actually improves over time, so make a big batch. Start with half the chilies if you're new to Thai heat—you can always add more later. The first time you taste that umami punch from the shrimp paste, you'll be hooked. Trust me, it's a game-changer for any dish.
Why You'll Love This Recipe
- No-Fuss Blend: I swear by this sauce because it’s actually just a quick pound-and-stir. No fancy techniques—just smashing garlic, shallots, and lemongrass with a mortar and pestle (or a rolling pin in a pinch) until the kapi’s funky umami blooms. That’s it. No waiting for reductions or balancing complex sauces.
- Umami Bomb: Between us, the kapi is the MVP here. It’s salty, funky, and deep—like a little flavor explosion that makes every bite sing. Pair that with the bright, grassy lemongrass and the heat from Thai chilies, and you’ve got a sauce that’s addictive without trying too hard.
- Endless Pairings: This isn’t just for pad thai. Drizzle it over grilled chicken, toss it with noodles, or even slather it on a burger. Honestly, I’ve used it in everything from stir-fries to deviled eggs (yes, really), and it always works. The best part? It keeps well in the fridge for weeks, so you’re never stuck without it.
- Budget Magic: Fermented shrimp paste might sound fancy, but it’s cheap—a tiny jar lasts forever, and the rest of the ingredients are pantry staples. I made a whole batch last month, and it’s still going. Plus, the heat and depth mean you use less of it per dish, so your money stretches even further.
Step-by-step instructions for authentic Thai chili sauce
Here's how to craft this bold, umami-rich sauce that balances heat, tang, and sweetness perfectly.
Prepare the Aromatics and Chilies
In a small bowl, combine the peeled and roughly chopped 6 cloves garlic, 4 whole shallots, and the 2 whole lemongrass stalks cut into 2-inch pieces. Using your hands, gently bruise the lemongrass by pressing firmly along each stalk—this releases its essential oils. Add the 6 whole Thai Bird's Eye Chilies (stems removed, seeds kept) to the bowl.
This prep work is crucial for building flavor. The lemongrass needs bruising to infuse properly, while keeping the chili seeds ensures maximum heat. I like to use a mortar and pestle for this step if available—it creates a more aromatic paste than chopping alone.
Cook the Base Until Fragrant
Heat a medium saucepan over medium heat and add the prepared aromatics. Cook for 5-7 minutes, stirring frequently, until the shallots soften and turn translucent. You'll notice the mixture releases moisture and develops a deep golden color—this is your signal to proceed.
Don't rush this step. The aromatics need time to develop their flavors before adding the fermented shrimp paste. If the mixture starts to brown too quickly, reduce the heat slightly. The goal is to create a fragrant base that will carry all the other flavors.
Add Fermented Shrimp Paste and Sweeten
Lower the heat to medium-low and add the 2 tbsp fermented shrimp paste (kapi). Stir continuously for 2-3 minutes until the paste dissolves completely and the mixture becomes aromatic. You'll smell that unmistakable umami punch—this is where the sauce gets its authentic depth.
Next, add the 0.25 cup palm sugar and stir until it melts into the mixture. The sugar helps balance the heat and acidity later in the process. If you notice any sugar granules remaining, add a splash of water to help dissolve them completely.
Build the Sauce with Vinegar and Fish Sauce
Increase the heat to medium-high and pour in the 0.5 cup white vinegar. Bring the mixture to a gentle simmer, then reduce heat to medium-low. Let it cook for 5-7 minutes until the liquid reduces by about half and the sauce thickens slightly.
Add the 1 tbsp fish sauce and 0.5 tsp salt, stirring well to combine. Taste the sauce at this point—you should notice a complex balance of sweet, sour, salty, and umami flavors. The heat from the chilies should be present but not overwhelming at this stage.
Simmer to Perfection
Continue simmering the sauce for an additional 8-10 minutes until it reaches your desired consistency. The sauce should coat the back of a spoon but still be pourable. If it thickens too much, add 1-2 tablespoons of water to reach the perfect balance.
For authentic Thai chili sauce, the texture should be slightly syrupy but still flow smoothly. Remove from heat and let it cool completely before tasting again—flavors develop further as it cools. This sauce keeps well in the refrigerator for up to 2 weeks, so you can make a big batch for future use.
Pro Tips For Making Authentic Thai Chili Sauce
- Char the Aromatics First: Blister the garlic, shallots, and lemongrass in the dry pan until deep golden—almost black in spots. That smoky bitterness is what carries the dish, not just flavor but soul. I used to rush this, and the sauce always tasted flat until I learned to let them sit and caramelize properly.
- Toast the Kapi Low: Add the fermented shrimp paste (kapi) to the pan after the chilies, and cook it on the lowest heat possible—just enough to warm through. Too much heat and it burns, turning the sauce bitter. Stir constantly, like you’re babysitting a toddler, and remove it the second it’s fragrant but still dark brown.
- Pound the Lemongrass: Skip the mincer—use the flat side of your knife or a mortar and pestle to bruise the lemongrass stalks before adding them. This releases the oils and citrusy punch without turning the sauce into a chunky mess. Yes, it’s more work, but the difference in brightness is night and day.
- Strain for Smoothness: Let the sauce sit for 10 minutes after cooking, then strain it through a fine-mesh sieve lined with cheesecloth. This removes the fibrous bits from the lemongrass and shallots, giving you a silky texture that’s restaurant-quality. I know, I know—it’s an extra step, but your future self will thank you when you drizzle it over pad see ew.
Regional styles of this dish
Central Thai Style
This version mirrors the classic nam prik pao from Thailand's central plains, where shrimp paste and palm sugar create that signature sweet-spicy balance. The key is using Thai Bird's Eye chilies (keep seeds for maximum heat) and letting the shrimp paste develop its funky umami over the simmer.
I find the best results come from cooking the aromatics until they're deeply fragrant—this builds the sauce's complexity. 🌶️
For extra authenticity, add 1 tsp tamarind paste at the end—it deepens the tangy profile. The sauce should be vibrant red and coat the back of a spoon without being gluey.
Serve it with grilled pork or as a dipping sauce for spring rolls. This is the version you'll find at Bangkok street markets.
Northern Thai Version
Northern Thailand's nam prik num skips the shrimp paste and relies on fermented soybean paste for depth, plus extra garlic and shallots. Swap the shrimp paste for 2 tbsp fermented soybean paste and increase garlic to 8 cloves.
The result is earthier with a stronger garlic-forward flavor—perfect for pairing with hearty northern dishes like khao soi or sai oua.
Northern Thai cooks often add 1 tsp coriander seeds toasted and ground into the sauce for extra aroma. The heat level should be milder than central Thai versions, so reduce chilies to 4-5 if you're sensitive to spice.
This version has a deeper, nuttier profile that stands up to rich curries.
Southern Thai Adaptation
Southern Thailand's nam prik kapi (shrimp paste sauce) is what this recipe is based on, but the region adds galangal and kaffir lime leaves for citrusy depth.
Add 1 tbsp sliced galangal with the aromatics and 2 kaffir lime leaves (bruised) when simmering. The galangal gives a peppery, pine-like note that's unmistakably southern. 🌿
For extra heat, Southern Thai cooks often add 1-2 dried Thai chilies to the simmer. The sauce here should be slightly thinner than central versions to complement coconut-based dishes like massaman curry. This is the version you'd find in Phuket or Krabi, where seafood dominates the cuisine.
Isan-Inspired Variation
Isan (Northeast Thailand) takes the sauce in a completely different direction with roasted garlic and dried shrimp. Start by roasting the garlic until deep golden brown, then blend with 1 tbsp dried shrimp (soaked and chopped) before cooking.
The result is smoky-sweet with a briny depth. Isan versions often include 1 tsp sugar palm (if available) for extra caramelization.
This variation pairs perfectly with Isan staples like larb or som tam. The heat level should be medium-high, so use 5-6 Bird's Eye chilies with seeds removed. The sauce will have a slightly grainier texture from the roasted garlic and dried shrimp, which adds wonderful complexity.
Nutrition facts
Frequently asked questions
Can I substitute fermented shrimp paste with something else?
For a vegan version, replace shrimp paste with 2 tbsp soy sauce plus 1 tbsp finely chopped mushrooms (like shiitake) for umami depth. The flavor won't be identical, but it works well in a pinch. For a seafood-free alternative, try 1 tbsp anchovy paste if you're comfortable with fish flavors.
How do I adjust the heat level?
For milder heat, remove chili seeds before cooking. For extra spice, add 1-2 extra Bird's Eye chilies or a pinch of cayenne at the end. Remember: Thai chili sauces are meant to be bold, so don't be afraid to embrace the heat! The sauce will mellow slightly as it cools.
Can I make this sauce without vinegar?
While vinegar is traditional, you can substitute with lime juice (add 2 tbsp) or even rice vinegar for a milder tang. The sauce will taste slightly different but still delicious. For best results, use vinegar—it's essential for that authentic Thai brightness.
How long does this sauce keep?
The sauce stays fresh in an airtight container in the fridge for 1 month. For longer storage, sterilize jars and process in a water bath for 10 minutes—this preserves it for up to 6 months. The flavor actually improves with time, developing deeper complexity as it ages.
What's the best way to use leftover sauce?
Drizzle it over pad thai, stir into tom yum soup, or use as a dipping sauce for grilled meats. It also elevates fried rice or spring rolls instantly. For extra flavor, let it sit at room temperature for 10 minutes before using—this brings out its aromatic qualities.