
Sauces & Condiments
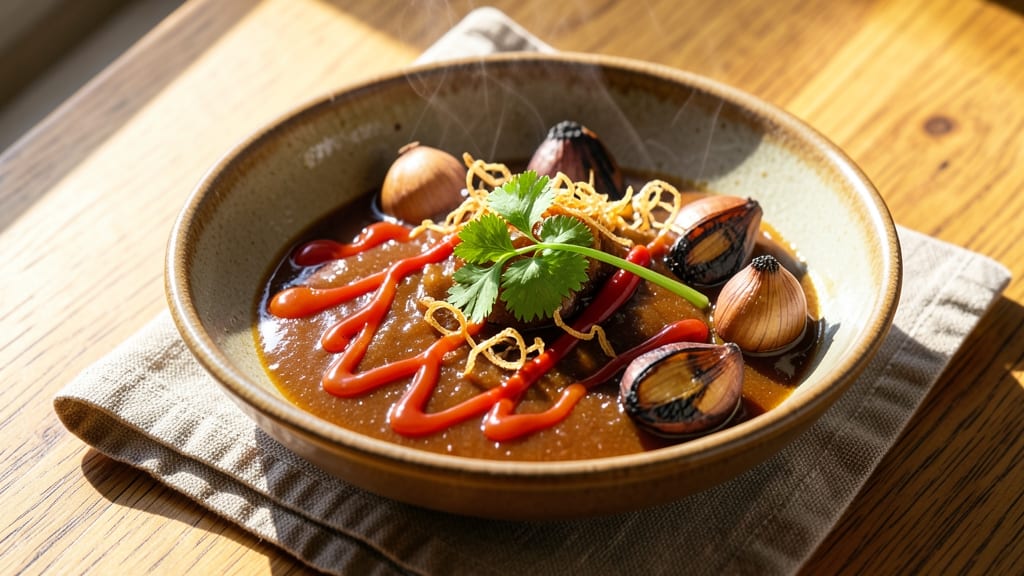
This Asian sticky sauce recipe transforms simple pantry staples into a glossy, umami-rich glaze that elevates stir-fries, marinades, and dipping sauces. The secret lies in balancing sweet, salty, and tangy flavors through careful reduction—no complicated techniques required, just patience and a few key ingredients.
I developed this version after years of testing, ensuring it delivers that signature sticky texture without overpowering your dish.
The foundation starts with soy sauce and honey, simmered until thickened, then brightened with rice vinegar and aromatics like garlic and ginger. A splash of sesame oil adds depth, while a pinch of red pepper flakes introduces subtle heat.
What makes this sauce special is its versatility—drizzle it over noodles, toss it with grilled meats, or use it as a dipping sauce for spring rolls. The glossy finish comes from a quick cornstarch slurry at the end, giving it that restaurant-quality sheen.
By the time you’re done, you’ll have a sauce that’s rich yet balanced, with a perfect harmony of sweetness and umami. It keeps well in the fridge for up to two weeks, making it ideal for meal prep.
Whether you’re cooking for one or feeding a crowd, this sauce is your secret weapon for adding depth and stickiness to any dish. Let’s make it—your taste buds will thank you.
For extra flavor, toast the sesame seeds and sprinkle them on top before serving. The nutty aroma enhances the sauce’s complexity, turning a simple glaze into something truly special. Ready to elevate your cooking? Here’s how to make it.
Ingredients for asian sticky sauce
Nine pantry staples transform into a restaurant-quality sauce with just 20 minutes of simmering.
| Ingredient | Amount | Notes |
|---|---|---|
| Light Soy Sauce 🥄 | ½ cup | Use high-quality brand like Kikkoman |
| Honey 🍯 | ½ cup | Wildflower preferred for depth |
| Rice Vinegar 🍶 | ¼ cup | Seasoned works best for flavor |
| Sesame Oil 🫒 | 1 tbsp | Toasted for nutty aroma |
| Cornstarch 🌾 | 1 tbsp | For glossy finish |
| Garlic Cloves 🧄 | 4 cloves | Minced for aromatic base |
| Fresh Ginger 🌿 | 1 tbsp | Grated, peel removed |
| Red Pepper Flakes 🌶️ | ½ tsp | Adjust for heat preference |
| Toasted Sesame Seeds 🌰 | 1 tbsp | For garnish and texture |
| Water 💧 | ¼ cup | For cornstarch slurry |
The soy sauce and honey are your foundation—Kikkoman soy sauce gives the best balance of saltiness and umami, while wildflower honey adds subtle floral notes. Trader Joe's has great options for both, and I always grab the sesame oil there too—it’s toasted and has that perfect nutty aroma. Fresh ginger and garlic are non-negotiable for authentic flavor, but if you’re in a pinch, jarred minced ginger works (just drain it well). The red pepper flakes can be skipped entirely if you prefer no heat, but they add that signature depth you find in Asian sauces. Pro tip: Toast your sesame seeds in a dry pan for 30 seconds—they’ll smell like heaven and add crunch to whatever you drizzle this over.
No soy sauce? Coconut aminos works in a bind, though it’s slightly sweeter. Substitute maple syrup for honey if you’re vegan (though the sauce won’t be identical). Jarred minced garlic is fine, but fresh is always better. The cornstarch slurry is key for that glossy finish—don’t skip it. If you’re making a big batch, double the cornstarch and water. For extra richness, add a splash of vegetable broth instead of water. And if you can’t find toasted sesame oil, regular sesame oil works—just add a pinch of sugar to balance the rawness.
This sauce keeps for 2 weeks in the fridge, sealed tightly in a jar. The flavor actually improves over time as everything melds together. For meal prep, I make a big batch and portion it into small containers—perfect for drizzling on stir-fries or tossing with noodles. Freeze extras in ice cube trays for single-use portions. And if you’re feeling fancy, strain the sauce through a fine-mesh sieve for a silky-smooth texture. Trust me, the effort is worth it for that restaurant-quality sheen.
Why You'll Love This Recipe
- Pantry Magic: This sauce lives in my fridge because it’s made with five things I always have—no extra shopping. Light soy and honey balance perfectly, while a splash of rice vinegar keeps it bright without overpowering.
- Sweet-Savory Fix: That sticky-sweet glaze? It’s ridiculously addictive—salty from the soy, tangy from the vinegar, and a whisper of sesame oil that makes everything taste like takeout. Drizzle it on chicken, toss it in noodles, or even slather it on grilled veggies.
- Weeknight Swiss Army: It’s my go-to for lazy dinners, potlucks, or when I’m too tired to think. Double the batch and freeze half—thaw and toss with stir-fry or roasted proteins later. Honestly, I’ve used it on everything from dumplings to deviled eggs.
- Budget Glaze: A single jar of soy sauce and a bottle of honey stretch for months of saucy meals. The cornstarch thickens it just enough to coat without clumping, so you’re not wasting a drop. (Yes, even on a Tuesday night.)
Step-by-step instructions for Asian sticky sauce
Here's how to make this perfect umami-packed glaze that'll elevate any stir-fry or grilled dish.
Prepare the Aromatic Base
In a small saucepan, combine the 0.5 cup light soy sauce, 0.5 cup honey, and 0.25 cup rice vinegar. Bring this mixture to a gentle simmer over medium heat—you'll see small bubbles forming at the edges. Let it cook for 5 minutes, stirring occasionally, until the honey fully dissolves and the mixture becomes slightly thickened.
While this simmers, mince the 4 cloves garlic and grate the 1 tablespoon fresh ginger. Add these to the saucepan and cook for another 2 minutes until fragrant. Here's the thing—don't walk away. Garlic burns fast, and you want that aromatic punch without bitterness. The mixture should smell rich and complex, like you're standing in an Asian street food market.
Build the Glossy Texture
In a separate small bowl, whisk together the 1 tablespoon cornstarch and 0.25 cup water until completely dissolved. This creates your thickening slurry—it's what gives the sauce that signature glossy finish. Pour this mixture into the saucepan with the simmering ingredients and stir constantly.
Watch carefully as the sauce begins to thicken—it'll go from liquid to a glossy glaze in about 3-4 minutes. You're aiming for a consistency where it coats the back of a spoon but still flows smoothly. If it thickens too quickly, add 1 tablespoon water at a time until you reach that perfect balance. The sauce should be thick enough to cling to food but still drizzle nicely when poured.
Finish with Flavor Layers
Reduce the heat to low and stir in the 1 tablespoon sesame oil and 0.5 teaspoon red pepper flakes. Let the sauce simmer gently for 1 more minute, just to let those flavors meld together. Here's where the sauce comes together—you'll notice it becomes even more aromatic with that nutty sesame depth and subtle heat.
Remove the saucepan from heat and let it cool slightly for 5 minutes. This resting period allows the flavors to fully develop. While it cools, you can give it a final taste and adjust the seasoning if needed—maybe a pinch more soy sauce for saltiness or a touch more honey for sweetness. The sauce should taste perfectly balanced between sweet, salty, tangy, and umami with just a hint of spice.
Garnish and Store
Transfer the sauce to a clean jar or bowl and sprinkle the 1 tablespoon toasted sesame seeds on top. These seeds add beautiful texture and visual appeal. Stir them in gently so they're distributed throughout but still visible as garnish. The seeds will toast slightly when you use the sauce, adding another layer of flavor.
Let the sauce cool completely before storing. It'll keep in the refrigerator for up to 2 weeks, making it perfect for meal prep. When you're ready to use it, simply reheat in a small saucepan over low heat until warmed through. This sauce is incredibly versatile—drizzle it over stir-fries, glaze grilled meats, or even use it as a dipping sauce. The possibilities are endless!
Pro Tips For Making Asian Sticky Sauce
- STIR CONSTANTLY ON HIGH HEAT: I learned this the hard way—letting the sauce simmer too low means you’ll end up with a lumpy, half-cooked mess. Once you add the cornstarch slurry, crank the heat to medium-high and keep that spoon moving relentlessly until it thickens. The second it starts to coat the back of a spoon, pull it off the heat—no peeking, no pausing.
- WHISK THE HONEY FIRST: That jar of honey? Don’t just dump it in cold. Whisk it with the rice vinegar and a splash of soy sauce before adding heat—this breaks up the viscosity and prevents clumping. I used to skip this, and my sauce would either turn grainy or refuse to emulsify properly. Takes 30 seconds but makes a real difference.
- SALT THE SOY SAUCE: Light soy sauce is already salty, but if you’re using it as the base, add a pinch of extra salt (about ¼ teaspoon per 2 tablespoons) to balance the sweetness. Trust me, your taste buds will notice the difference—especially if you’re serving it over bland proteins like tofu or chicken. It’s the thing that matters most when the sauce feels flat.
- TEST THE SLURRY TEMPERATURE: Skip the guesswork—mix your cornstarch with cold water (1 tablespoon cornstarch to 2 tablespoons water) and let it sit for 2 minutes. Then, add it to the still-simmering sauce, not boiling. If you dump it in too hot, the starch burns before it can thicken. I was skeptical until I tried it—now I never risk it.
Make-ahead tips for this recipe
Batch Prep Strategy
Double or triple the recipe when making ahead—this sauce scales perfectly. I like to use a 6-quart saucepan for larger batches, which gives me enough for 4-5 meals. Store in glass mason jars (I prefer 16-ounce size) because they’re airtight and easy to reheat.
Label with the date—trust me, you’ll forget how long it’s been sitting there! 📅
Freezing for Later
Freeze in ice cube trays for single-use portions—just pop out what you need and reheat. For larger quantities, use silicone molds or small jars with 1-inch headspace to prevent cracking.
Thaw overnight in the fridge or reheat directly from frozen over low heat with 1 tablespoon water to prevent burning. The texture stays glossy if handled gently. ❄️
Flavor Boost Hacks
Add 1 teaspoon fish sauce (like Red Boat) when reheating for extra umami depth. For a smoky twist, stir in ½ teaspoon smoked paprika. If you’re prepping for a week, freeze half the batch with 1 extra tablespoon of honey—it’ll taste richer after thawing.
I also like to toast extra sesame seeds, then sprinkle them over reheated sauce for fresh crunch. 💡
Reheating Perfection
Gently reheat on the stovetop over low heat, stirring constantly to prevent scorching. A splash of hot water(about 1 tablespoon) helps restore that glossy texture. Microwave in 30-second bursts, stirring between each, to avoid a skin forming.
The sauce should warm through to 165°F, but not boil—just enough to make it drizzle beautifully. 🔥
Long-Term Storage
This sauce keeps for 3 months in the freezer, but quality starts to degrade after 2 months. For best results, use within 2 weeks refrigerated. If it thickens too much after freezing, thin with 1 teaspoon water.
The flavor actually improves over time as the spices meld, but texture is key—always reheat gently to maintain that restaurant-quality sheen. ✨
Meal Prep Pairings
Prep grilled chicken or tofu, marinate in half the sauce, then store separately. When ready to cook, toss with fresh veggies and reheat the sauce—it’ll cling perfectly. For stir-fries, store prepped ingredients in airtight containers, then combine with the sauce right before cooking.
I also love using this as a dipping sauce for spring rolls or dumplings***, keeping them in the freezer until ready to serve. 🍗
Nutrition facts
Frequently asked questions
Can I make this sauce without cornstarch?
Yes, but the texture will be thinner and less glossy. For a similar effect, use 1 tablespoon arrowroot powder instead—it works the same way. If you're avoiding both, reduce the liquid slightly and simmer longer, but expect a thicker, more syrupy consistency rather than a drizzling glaze.
How do I adjust the sweetness level?
Start with the recipe as written, then taste and adjust. For less sweetness, reduce honey to 0.375 cup and add 1 extra tablespoon soy sauce for saltiness. For more sweetness, add 1-2 teaspoons maple syrup when reheating. The sauce should balance sweet, salty, and umami flavors—aim for that perfect harmony.
What's the best way to use this sauce?
This versatile sauce works on everything! Drizzle it over stir-fries, grilled meats, or baked tofu for instant flavor. Use it as a marinade (coat protein for 30 minutes before cooking), or serve it as a dipping sauce for spring rolls or fried rice. The glossy texture makes it perfect for glazing too—try brushing it on pork chops or egg rolls during the last 2 minutes of cooking.
Why did my sauce turn out too thick?
This usually happens if you simmered too long or didn't add enough water during thickening. To fix it, whisk in 1 tablespoon warm water at a time until you reach the perfect drizzling consistency. For next time, watch the sauce closely during the cornstarch step—it should take 3-4 minutes to thicken properly. If it's still too thick after adding water, strain it through a fine-mesh sieve to remove excess cornstarch.
Can I make this sauce spicier?
For more heat, add 1 teaspoon extra red pepper flakes or ½ teaspoon cayenne pepper when finishing the sauce. For a smoky kick, stir in ½ teaspoon smoked paprika at the end. If you love fresh heat, add 1 minced chili (like Thai bird's eye) when cooking the aromatics. Remember, you can always adjust heat when reheating too—just add a pinch more spice as needed.